Enable the Remote Features
Configure and activate remote access capabilities for your devices
Overview
Configure Policy
Create or edit policies to enable remote features
Remote Control
Enable unattended or attended remote access
Assign Devices
Apply policies to target devices via automation
Enable Remote Features
To enable remote features:
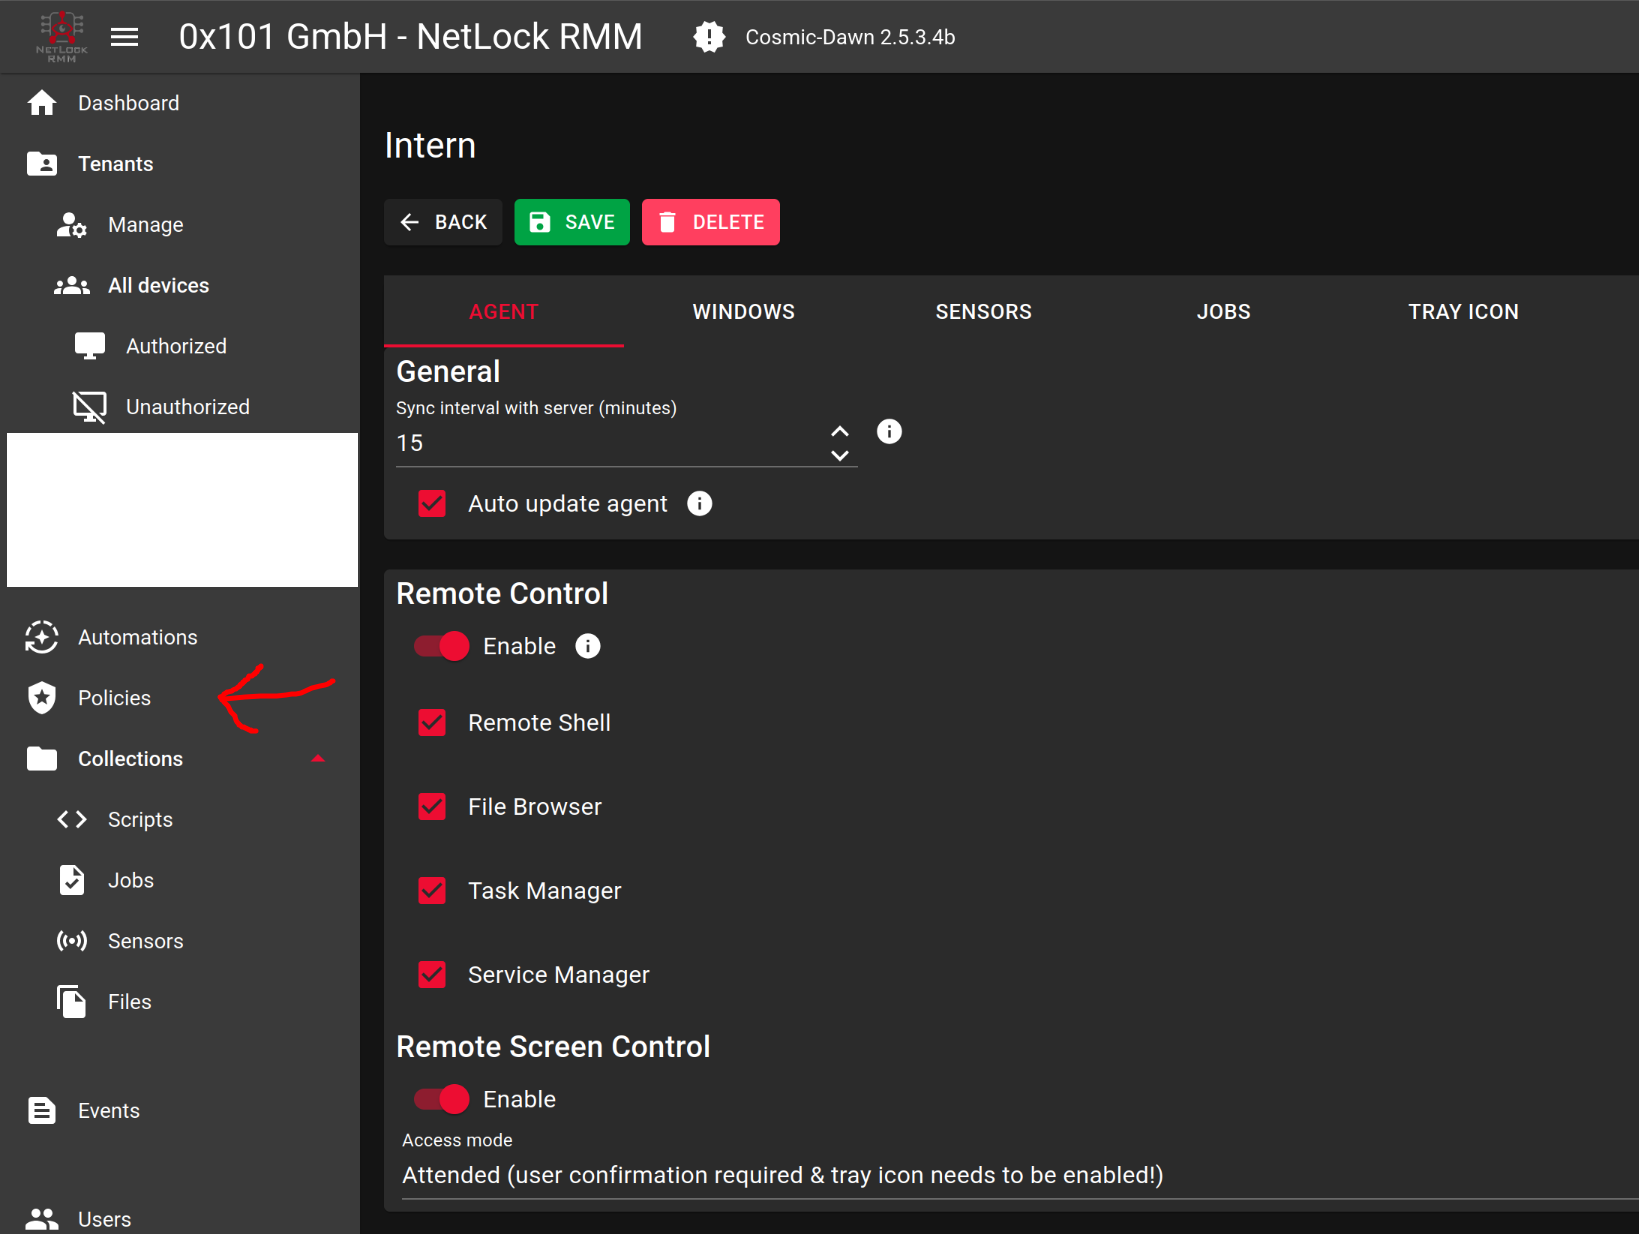
Create or edit a policy
Navigate to Policies and create a new policy or edit an existing one
Enable remote features
In the Agent section, turn on the remote features you want to use
Remote Screen Control
To enable remote screen control, configure the device for either unattended or attended access mode.
Unattended Access
Enables remote control of the device without requiring user interaction, including during Windows log‑in, so no end‑user confirmation is needed.
Attended Access
Prompts the end‑user with a dialog, allowing them to grant or refuse permission to view or control their screen.
Note: Enabling the tray icon via policy is required. If the icon was previously disabled, affected users must log out and back into the operating system before the tray icon appears.
Assign Policy to Devices
Now assign the policy to the target devices using automation.
Navigate to Automations
Open the Automations section in the web console
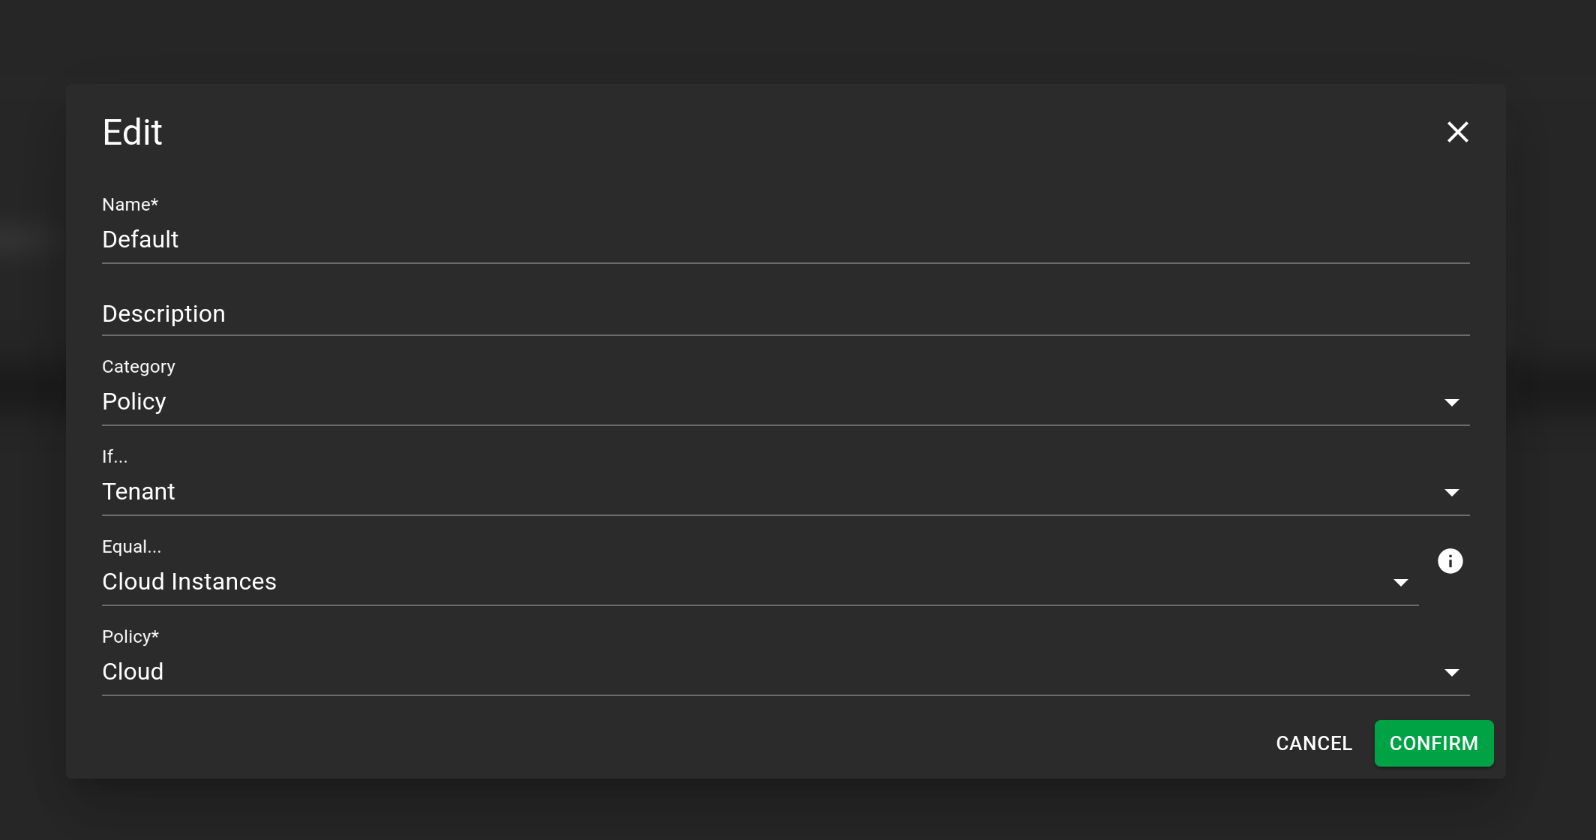
Choose the condition
Select when the policy applies — for newcomers, the Tenant condition is the simplest option
Pick the policy
Select the policy you just created or edited
Save the automation
Confirm and save your automation configuration
Verify Policy Assignment
Verify that the policy is applied to the intended devices:
Return to Device Overview
Navigate back to the Device Overview page
Check the Policy column
Look at the Policy column in the header to verify assignment
Success Indicator
If your policy appears in the Policy column, the assignment was successful.

Important: Wait for Synchronization
Wait for the devices to report a recent "Last contact" timestamp before the new policy takes effect. For a first‑time policy assignment this synchronization may require up to 30 minutes.